After chatting with some of my classmates last night (much love to Amy & Emily!) I realized that the plugin I used at first to display my Flickr slideshow is restricted to those of us with WordPress installs on our own webspaces. Never fear; Flickr Slideshow is here! All you need is
- Your photostream curated (see what I did there?) into an album
- Two tabs open; one to flickrslideshow.com, and the other to your WordPress client
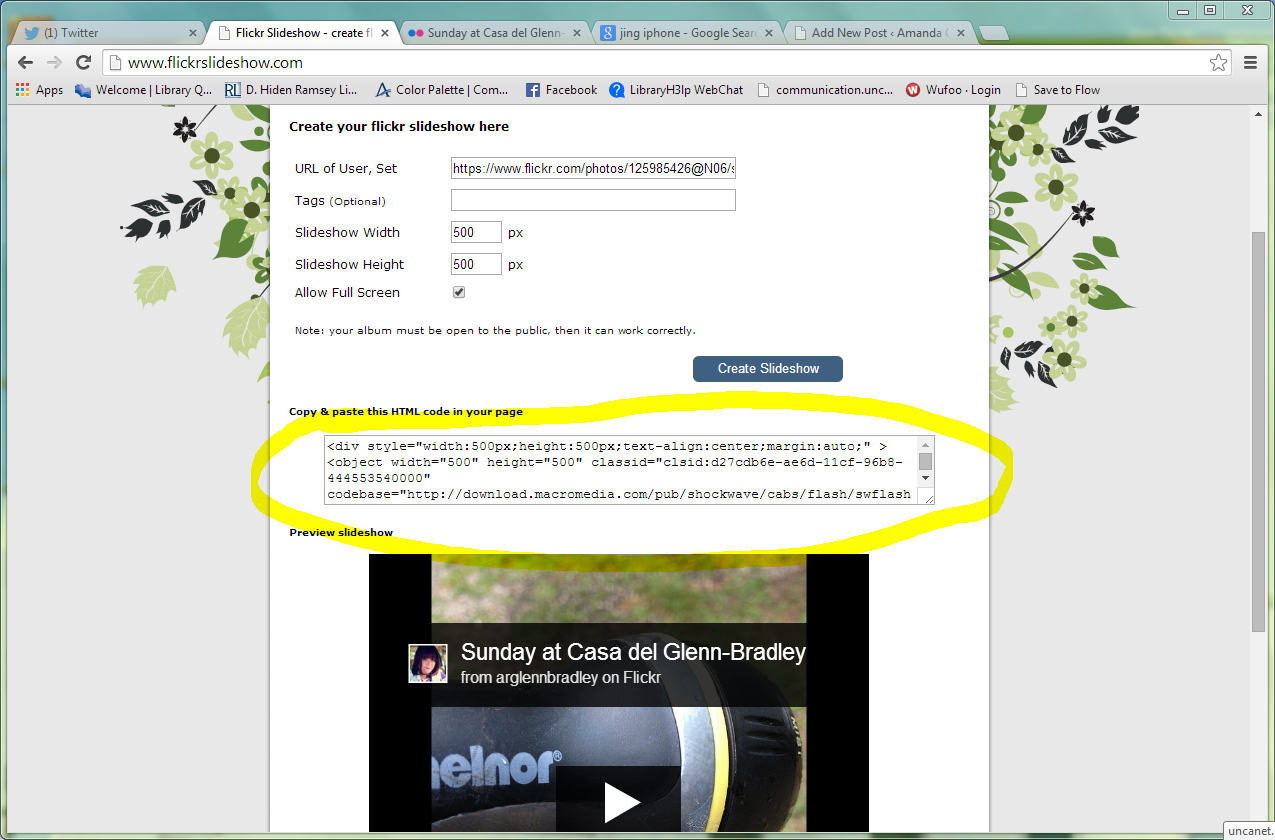
So, step one; copy and paste your album URL into the Flickr Slideshow form. Here’s a couple images to show you what it looks like!


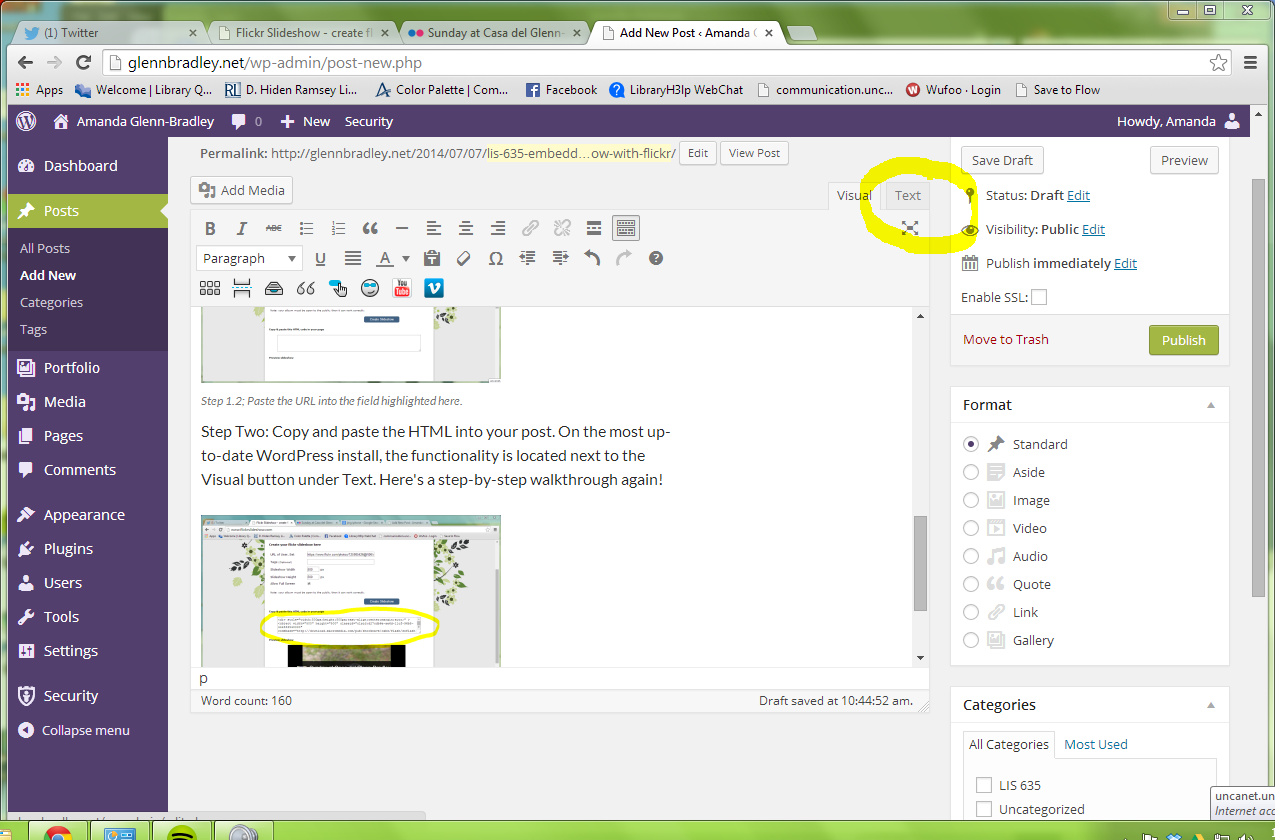
Step Two: Copy and paste the HTML into your post. On the most up-to-date WordPress install, the functionality is located next to the Visual button under Text. Here’s a step-by-step walkthrough again!
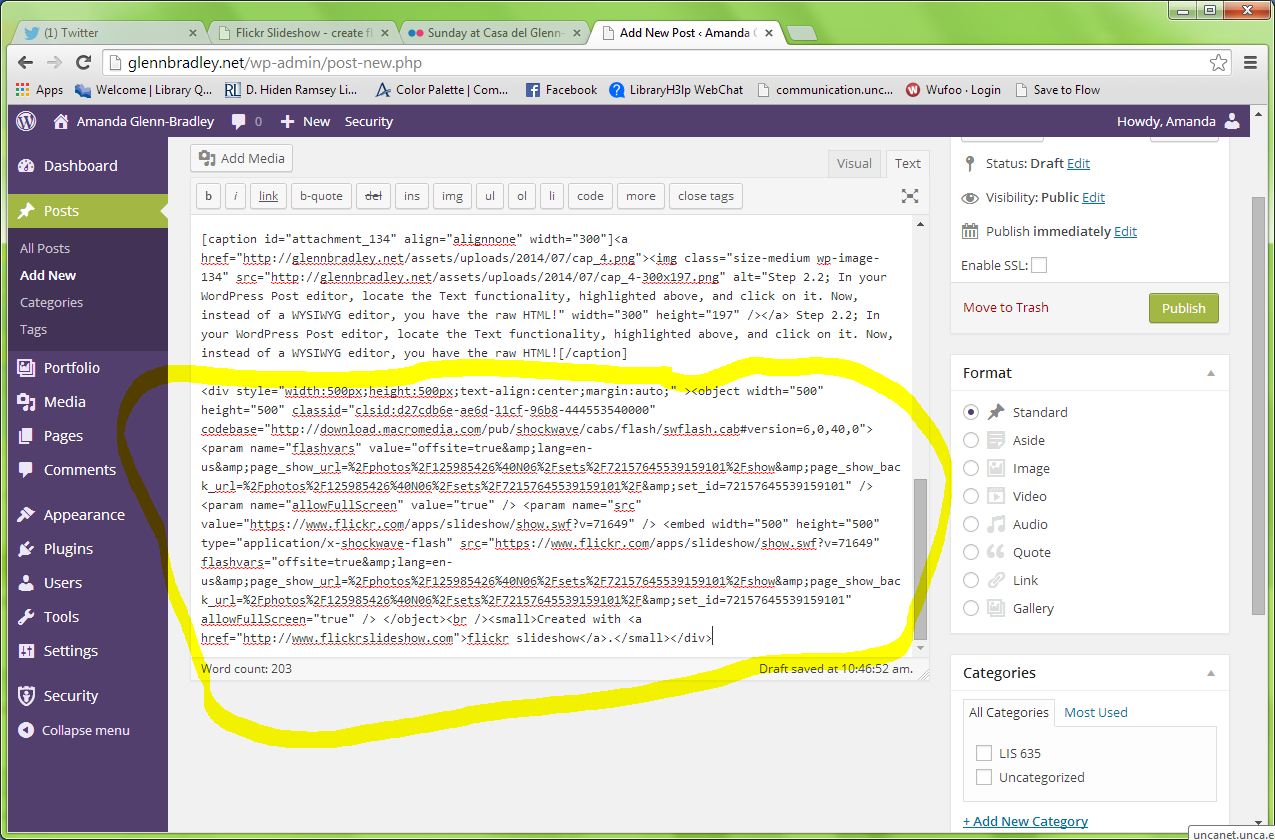
When you are in your post editor, the pictures will not show up, only a grey box will. Have no fear! Here’s what the slideshow will look like:
Linked here is a Jing screen tour (with the voiceover now!) on how I got the functionality to work. I hope this helps!